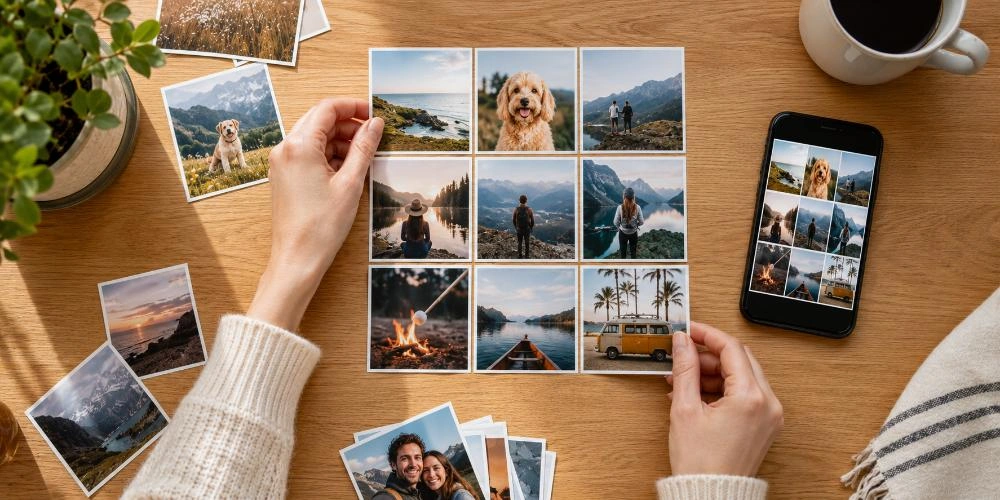
A single photo captures one moment. A photo collage captures the whole story — the whole holiday, the whole year, the whole friendship — in one frame. That is why collages are one of the most popular ways to use the hundreds of photos sitting on our phones doing nothing.
The good news? You do not need to be a designer to make a brilliant one. Whether you want a quick grid for Instagram, a hand-cut collage for a scrapbook, or a proper piece of wall art, the basic steps are the same. This guide walks you through all three routes, start to finish, in plain English.
We will cover how to pick the right photos, how to make a collage for free on any phone or computer, how to make one by hand, and — the bit most guides skip — how to get it looking sharp when you print it. By the end you will know exactly which method suits what you are trying to make.
In short. To make a photo collage: choose 4–12 photos that share a theme, pick a layout (a grid for equal photos, or one big "hero" photo with smaller ones around it), arrange them with even gaps, then save or print. Free tools like Google Photos, Canva and Adobe Express do this in minutes; a glue stick and card do it by hand.
Key Takeaways
Start with the photos, not the tool. Four to eight images that share a theme make a better collage than any clever app.
Match the layout to your photos: a grid for equal shots, a hero layout for one standout, a mosaic for mixed shapes.
Free is genuinely fine. Google Photos, Canva and Adobe Express all make polished collages at no cost, on any device.
iPhone has no built-in collage button — use the Shortcuts app or a free app like Layout or Canva.
Decide screen-or-print early. For printing, aim for 300 DPI and export the largest, highest-quality file.
Pick the right home: a single design suits a canvas or poster; separate prints suit a gallery wall; hundreds of photos belong in a photo book.
First, What Makes a Good Collage?
The word collage comes from the French "coller", meaning to glue. Originally it meant sticking cut-out paper and photos onto a surface. Today most collages are digital, but the idea is the same: several images brought together to make one new picture that says more than any single shot could.
Before you open an app or reach for the scissors, it helps to know what separates a collage that looks considered from one that looks like a muddle. It comes down to three things.
A clear theme
The best collages are about something. A weekend in the Lake District. Your dog's first year. Nan's 80th. When every photo belongs to the same story, the collage feels intentional even before you have arranged a single image. A random mix of unrelated snaps rarely lands.
A sense of balance
Balance is what stops a collage feeling lopsided. Spread your busiest, brightest photos around rather than bunching them in one corner. Mix close-ups with wider shots so the eye has somewhere to travel. And leave a little breathing space — a collage does not have to be crammed edge to edge to feel full.
Colours that get along
You do not need matching photos, but photos that share a mood sit together far more happily. A set of warm, sunny holiday shots looks cohesive. The same shots mixed with a few cold, grey indoor photos can feel jarring. If your photos clash, converting them all to black and white is a reliable fix — it instantly makes any mix look deliberate.
The one rule worth remembering
Less is more. Four to eight strong photos almost always beat twenty average ones. If you are unsure whether a photo earns its place, leave it out. A collage is a highlight reel, not a photo dump.
Step 1: Choose and Prepare Your Photos
Every good collage starts here, long before you pick a tool. Spend a few minutes getting this right and the rest becomes easy.
Pick a workable number
For most collages, four to twelve photos is the sweet spot. Fewer than four and it barely reads as a collage; many more than twelve and each photo shrinks until faces become hard to make out. If you have a huge set — say a whole holiday — a photo book is a better home for them all, which we will come back to later.
Check your photos are sharp enough
This is the step people most often skip, and it is the one that ruins printed collages. A photo that looks fine on your phone screen can turn blurry and pixelated once it is enlarged and printed. The rule of thumb: the bigger you print, the more pixels (resolution) each photo needs.
If your collage is only ever going on Instagram, almost any recent phone photo is fine. If you are printing it, use the largest, sharpest versions you have — not screenshots, not heavily zoomed shots, and not tiny images saved from a chat app. We have put together the exact numbers below when we get to printing.
Do a little light editing
You do not need fancy software. A few small tweaks in your phone's built-in editor or a free app like Snapseed make a real difference:
Crop out clutter so the subject fills more of the frame — this matters even more in a collage, where each photo is already small.
Nudge up the brightness and contrast slightly. Photos often look a touch flat once shrunk down.
Keep the colour treatment consistent. If you brighten one photo, give the others a similar lift so they match.
Step 2: Pick Your Method
There are three ways to make a collage, and the right one depends entirely on what you want at the end. Here is a quick comparison before we walk through each.
Method
Best for
Skill needed
Time
Digital (free tools)
Social media, sharing, printing later
None
5–15 mins
By hand
Scrapbooks, cards, craft gifts, a personal touch
A little patience
30–60 mins
Print-ready wall art
A lasting display or a proper gift
None — done for you
10 mins to order
Most people start digital, so that is where we will begin. Skip ahead to the by-hand section if you fancy something more crafty.
How to Make a Photo Collage Digitally (Free)
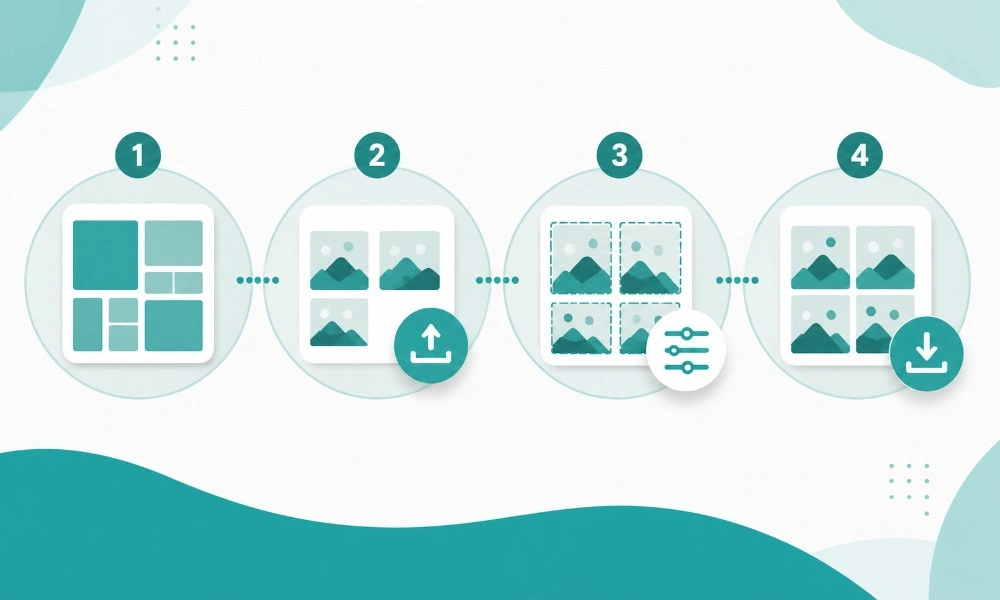
Making a collage on a phone or computer is genuinely quick, and you do not need to pay for anything. The exact buttons differ between apps, but every collage maker follows the same four steps. Learn the pattern once and you can use any tool.
The four steps that work in any app
Choose a layout. This is the frame your photos slot into. A grid (2×2, 3×3) suits photos of equal importance. A "hero" layout puts one large photo in the middle with smaller ones around it — great when you have one standout shot.
Add your photos. Drag them in, or tap an empty cell to upload. Most apps let you swap, crop and rotate each photo after it is placed, so do not worry about getting the order right first time.
Adjust the spacing and background. Widen or narrow the gaps between photos, round the corners for a softer look, and set the background colour. White gaps look clean and modern; a dark background makes bright photos pop.
Save or export. Download as a JPEG for sharing online, or a PNG for the sharpest quality. If you plan to print, export the largest, highest-quality file the app offers.
The best free tools, and what each is good at
You have plenty of choice, and they are all free to start. Here is where each one shines:
Tool
Works on
Best for
Google Photos
Android, iPhone, web
The fastest option — your photos are already there
Canva
iPhone, Android, web
Templates and text, great for social posts
Adobe Express
iPhone, Android, web
Polished layouts and easy background removal
Apple Photos / Shortcuts
iPhone, iPad
Quick grids without downloading anything
Instagram Layout
iPhone, Android
Collages made specifically to post to Instagram
How to make a collage on an iPhone
Here is the honest starting point: the built-in Photos app on iPhone still has no proper collage button, whatever you may have read. So you have two free routes that need no third-party app.
The quickest way — the built-in Shortcuts app:
Open the Shortcuts app (it comes with every iPhone). If it is missing, download it free from the App Store.
Tap the Gallery tab at the bottom, search for "Photo Grid", and tap Add Shortcut.
Go back to the Shortcuts tab and tap your new Photo Grid shortcut.
Select the photos you want (they work best when they are a similar shape, as the grid crops to fit), then tap Add.
Tap Done, then Save to Photos — your collage lands in your camera roll, ready to share.
For more control — the Combine Images method (iOS 16 and later): open Photos, select up to 10 images, tap Share, then Copy Photos. Open Shortcuts, create a new shortcut, add the Combine Images action, set the input to Clipboard, and choose Horizontally, Vertically or In a Grid. This lets you pick how the photos stack, which the basic Photo Grid shortcut does not.
Prefer more design freedom? The free Layout from Instagram app and Canva both let you drag, swap and resize each photo, which the shortcuts cannot.
How to make a collage on Android
Google Photos is built in on most Android phones, and it is the simplest route by a mile:
Open the Google Photos app.
Tap and hold one photo, then tap the others to select up to six (or tap the search bar and choose Collage).
Tap Create at the top, then Collage.
Pick a template, then tap any photo to adjust its position. Tap Borders to change the width, corner roundness and colour.
Tap Save — the collage saves to your gallery.
Google Photos also works on iPhone and in any web browser, so it is the one tool that behaves the same on every device.
How to make a collage for Instagram
Instagram deserves its own note, because it is the reason many people make a collage in the first place — and it works differently for posts and Stories.
For a feed post: Instagram cannot build a feed collage inside the app. Make your collage in Google Photos, Canva or Layout first, then upload it as a single photo. Size it square (1080×1080px) or portrait (1080×1350px) — portrait fills more screen and tends to get more attention.
For a Story, the quick way: open a Story, tap the Layout icon on the left, choose a grid of two to six photos, add each one, then tap the tick.
For a Story, the freestyle way: take or choose a background, then use the photo sticker (add a sticker, tap the photo icon) to drop in and layer up to 10 images. This gives a scrapbook look the Layout grid cannot.
How to make a collage in Canva or Adobe Express
Both work the same on phone and computer. Open the app or website, search "collage", and pick a template. Drag your photos into the frames, tap any photo to crop or filter it, then adjust the spacing and background. When you are done, tap Download — JPEG for sharing, PNG for printing. Canva has the widest choice of templates and text options; Adobe Express is strong for clean layouts and one-tap background removal.
Making a collage to print later? When you export, always pick the highest quality and largest size the tool allows, and save as a PNG if the option is there. A collage sized for Instagram will look soft and blocky if you later try to print it at A3. Decide early whether it is for screen or paper — it changes the settings you choose.
Quick collage sizes for social media
Most apps set these automatically when you pick a platform, but here are the numbers if you are sizing a collage yourself:
Where it's going
Best size (pixels)
Shape
Instagram feed post
1080 × 1350
Portrait (4:5)
Instagram Story / Reel
1080 × 1920
Tall (9:16)
Facebook post
1200 × 1200
Square
WhatsApp / message
1080 × 1080
Square
Desktop wallpaper
1920 × 1080
Wide (16:9)
Once your digital collage is finished, printing it as a single sheet is the most affordable way to get it on the wall. A collage exported as one image can be sent off as a photo poster print, which handles large layouts nicely on matte paper without costing much. It is the natural next step for a grid you have already designed.
Key takeaways
iPhone has no built-in collage button — use the free Shortcuts app (Photo Grid or Combine Images), or apps like Layout and Canva for more control.
Google Photos is the easiest all-rounder and works the same on Android, iPhone and web.
Instagram makes Story collages in-app (Layout or photo stickers) but needs an outside app for feed collages.
Decide screen-or-print before you export: social sizes look blocky when printed large.
How to Make a Photo Collage by Hand
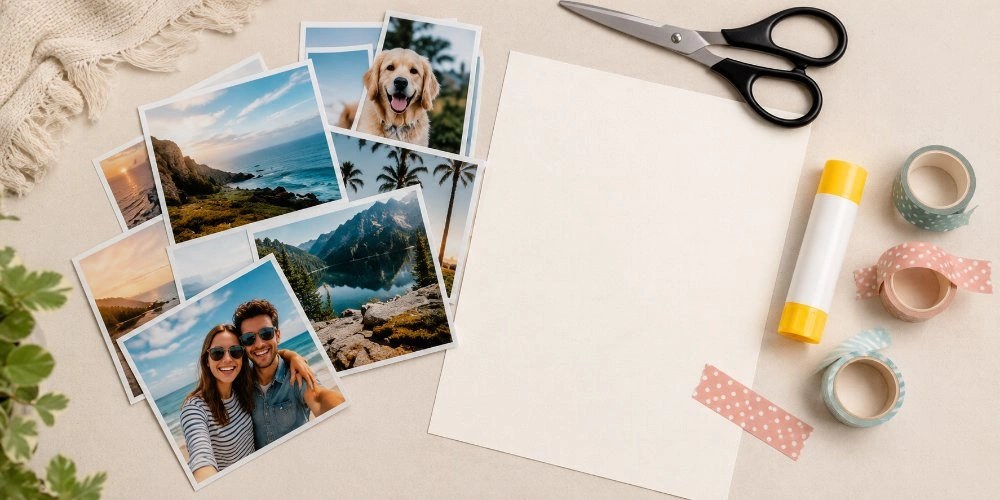
There is something a screen cannot quite match about a collage you have made with your own hands. Cut edges, overlapping photos, a bit of washi tape — it has warmth. Handmade collages make lovely cards, scrapbook pages and heartfelt gifts, and they are a brilliant rainy-afternoon project with kids.
What you will need
Printed photos — order standard prints, or print at home on matte or lustre paper (glossy is harder to handle and catches the light).
A base — thick card, cardstock or a poster board. Anything flimsy will buckle once glue dries.
A glue stick — better than liquid glue, which can wrinkle photos.
Scissors — ordinary ones are fine; craft scissors with patterned edges add a nice touch.
Optional extras — washi tape, coloured pens, stickers or scraps of patterned paper for a scrapbook feel.
The steps
Print your photos. Matte or lustre finish, and print a few spares in case of slips.
Trim and experiment. Cut some photos smaller, crop others into shapes. Lay everything on your base without gluing yet.
Arrange until it feels right. Shuffle photos around, overlap edges, and step back to check the balance. When you are happy, snap a photo on your phone so you have a reference.
Glue it down. Work from the background layer up to the top layer. Press each photo down firmly and smooth out any bubbles.
Add your finishing touches. A line of washi tape, a hand-written date, a small doodle. Keep it to one or two styles so it stays tidy rather than busy.
Craft tip. Photograph your layout before you glue anything. If a photo shifts or you knock the table, you have a map to put it back — and it lets you spot an off-balance corner you might have missed in the moment.
10 Collage Layouts (and When to Use Each)
Stuck on how to arrange your photos? These are the layouts that reliably work, whether you are building digitally or by hand. The first five are the everyday workhorses; the rest are worth knowing when you want something with more personality.
The grid
Equal-sized photos in neat rows and columns. Clean, calm and modern. A 2×2 suits four favourites; a 3×3 holds nine. Best when your photos are all roughly as important as each other.
The hero layout
One large photo takes centre stage, with smaller supporting shots arranged around it. Perfect when you have a single standout image — a wedding kiss, a birthday cake, a view — and want everything else to frame it. It gives the eye an obvious place to land first.
The mosaic
A looser, magazine-style mix of different-sized photos fitted together like a jigsaw. It feels dynamic and editorial, and it handles photos of mixed shapes far better than a rigid grid.
The strip
Photos in a single row or column — like an old photo-booth strip. Great for telling a story in order: before and after, or a sequence of moments through a day. Works especially well tall for phone screens and Stories.
The heart or shape
Photos arranged to fill an outline — most often a heart, but numbers and letters work too (a "40" for a 40th, or a child's initial). It takes a little more fiddling but makes a wonderfully sentimental gift for an anniversary or Valentine's Day.
Five more worth knowing
Layout
What it is
Best for
Overlapping pile
Photos scattered and layered like a stack on a table
A relaxed, scrapbook feel
Side-by-side
Two or three photos butted together, no gaps
Before-and-after, comparisons
Gallery
Photos spaced apart with lots of white around them
A calm, considered, gift-shop look
Zig-zag
Photos stepped diagonally across the frame
Playful social posts
Mood board
A themed mix of photos, colours and text
Planning a wedding, room or project
Which layout for how many photos? 2–4 photos: a grid, strip or side-by-side. 5–8 photos: a hero layout or a mosaic. 9 or more: a grid, gallery or shape collage. As a general rule, the more photos you add, the more a simple grid keeps things from looking chaotic.
If you cannot decide on a single fixed layout — or you simply enjoy rearranging things — there is a halfway house between a digital collage and a hand-made one. MIXPIX® photo tiles are individual 20×20cm photo squares with a nail-free magnetic and adhesive backing, so you can build a collage directly on your wall and move the tiles around whenever the mood takes you. It is a collage you are never quite finished with.
Step 3: Print Your Collage (Without It Looking Blurry)
This is the part that separates a collage you are proud of from one that disappoints. A collage that looked crisp on screen can turn soft and blocky in print if the photos were too small. Here is how to get it right.
Understanding resolution in one minute
Screens show images at low resolution and still look sharp because they glow. Paper does not. To print sharply, an image needs enough pixels packed into the space — the standard is 300 pixels per inch (300 DPI). Below that, printing enlarges each pixel until you can see them, which is what "pixelated" means.
Because a collage splits one sheet between several photos, each photo only fills part of the page — which actually works in your favour. A photo that would look soft printed large on its own can look perfectly sharp as one tile in a collage.
How sharp does each photo need to be?
Use this as a quick reference for the whole finished collage. If your individual photos comfortably clear these pixel counts, you are safe:
Finished collage size
Minimum pixels (long edge)
Good for
A5 (postcard-ish)
1,500 px
Cards, small gifts
A4 (standard sheet)
2,500 px
Desk frames, small walls
A3 (poster-ish)
3,500 px
Feature spot above a shelf
30×40cm canvas
3,000 px
Living-room wall art
50×70cm canvas
4,500 px
Statement piece
Not sure whether your photos make the grade? The simplest test: open a photo at full size on a computer screen. If it still looks sharp when zoomed in, it will print well. If it is fuzzy on screen, it will only look worse on paper.
The same pixel rules apply whatever you are printing. If you want the exact minimum figures for each print format — handy when you are choosing photos for a big piece — our guide to the best resolution for canvas prints breaks it down size by size.
Screen or paper? Set the right file type
For sharing online: JPEG is fine, and keeps file sizes small.
For printing: export as a PNG or the highest-quality JPEG available, at the largest size the tool offers.
Colour: what you see on screen can look slightly different in print, as screens and printers handle colour differently. Most print services adjust this for you, so it is rarely worth worrying about for a personal collage.
Key takeaways
Print at 300 DPI. Below that, photos look pixelated on paper even if they looked fine on screen.
A collage splits the page between photos, so each one only needs to be sharp for its small share — that works in your favour.
Simple test: if a photo looks sharp zoomed in on a computer, it will print well.
Export PNG or top-quality JPEG at the largest size for printing.
Step 4: Display Your Collage
You have made it — now give it a home. How you display a collage depends on whether it is a single printed sheet or a set of separate photos, and how long you want it to last.
If your collage is one printed image
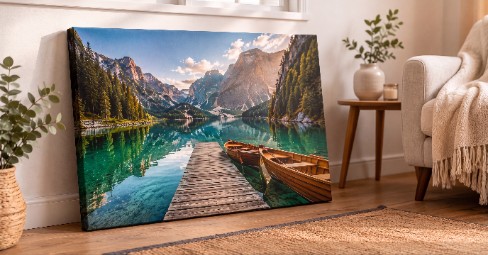
A collage you have designed as a single sheet can be framed like any print, propped on a shelf, or turned into a more durable piece. Printing the whole design onto canvas is a popular choice because it needs no glass, no frame and no fuss — it arrives ready to hang and holds up for years.
For a collage you want to keep, a collage canvas print does the design work for you: you upload your photos, choose from ready-made layouts holding several images, and it is printed gallery-wrapped on a wooden frame with room for up to eight photos. It is the tidiest way to turn a jumble of favourites into one finished piece of wall art.
If your collage is several separate photos
Sometimes the best "collage" is not one image at all, but a cluster of individual prints arranged on the wall — a gallery wall. This gives you more flexibility: you can mix sizes, add to it over time, and rearrange whenever you fancy a change. The trick is planning the spacing so it looks deliberate rather than scattered.
Arranging separate prints well is a small art in itself — spacing, alignment and where to start. If you are going down this route, a considered gallery-wall layout is worth planning on paper before a single nail goes in.
Hanging it without wrecking the walls
Renting, or simply nervous about drilling? You have gentle options. Adhesive strips hold lighter prints without a single hole, and picture rails (common in older UK homes) let you hang things with no wall damage at all. Damage-free methods — strips, hooks and rails — are worth a look before you commit to a spot.
When a Collage Isn't the Right Answer
Honesty helps here. A collage is perfect for a curated handful of favourites. But if you are trying to squeeze an entire holiday, a wedding, or years of family photos into one frame, everything shrinks until you cannot enjoy any of it.
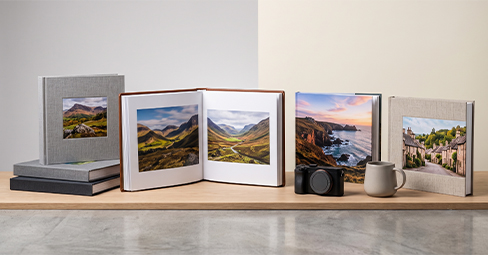
When you genuinely want to keep dozens or hundreds of photos, a photo book is the better home. It gives every photo room to breathe across its pages, tells a story in order, and sits happily on a coffee table. Think of a collage as the highlights and a photo book as the full match — they do different jobs, and many people make both from the same set of photos.
Frequently Asked Questions
How do I make a photo collage for free?
You can make a photo collage completely free using built-in and online tools. Google Photos, Canva and Adobe Express all offer free collage makers that work on phones and computers. Choose a layout, drag in your photos, adjust the spacing and background, then download the finished image to share or print.
How many photos should be in a collage?
Four to twelve photos works best for most collages. Fewer than four barely reads as a collage, while more than twelve shrinks each image until faces and details are hard to see. If you want to include dozens of photos, a photo book gives them far more room than a single collage can.
What is the best free app to make a photo collage?
For most people, Google Photos is the easiest because your photos are already in it and it works on both Android and iPhone. Canva is best if you want templates and text for social media, while Adobe Express offers polished layouts and easy background removal. All three are free to start.
How do I make a photo collage on my iPhone?
The quickest way is the free "Photo Grid" shortcut in Apple's Shortcuts app, which stitches selected photos into a grid saved to your camera roll. For more layout choices, use Google Photos or Canva from the App Store. Both let you pick a template, drop in photos and export in a couple of minutes.
How do I make a collage in Google Photos?
Open the Google Photos app, tap the search bar and choose Collage (or select your photos and tap Create, then Collage). Pick a template, adjust the borders, spacing and background colour, then tap Save. The finished collage lands in your gallery, ready to share or send off to print.
Can I print a photo collage I made online?
Yes. When you export your collage, choose the highest quality and largest size the tool offers, ideally as a PNG. You can then print it as a poster, frame it, or have it printed on canvas. Just make sure the individual photos were sharp enough for the size you are printing — 300 DPI is the target.
How do I make a photo collage by hand?
Print your chosen photos on matte paper, gather a card base, a glue stick and scissors, then arrange the photos on the base before gluing. Overlap edges for a scrapbook feel, photograph your layout as a backup, then glue from the bottom layer up. Finish with washi tape or hand-written notes.
What size should a collage be for Instagram?
For an Instagram post, a square (1080×1080 pixels) or portrait (1080×1350 pixels) collage works best, as these fill the feed. Most collage apps have ready-made Instagram presets, so you can pick the right size before you start rather than cropping afterwards.
Is it better to make a collage digitally or by hand?
It depends on what you want. Digital collages are faster, easy to redo, and simple to share or print — ideal for social media and wall art. Hand-made collages take longer but add a personal, crafted feel that suits cards, scrapbooks and heartfelt gifts. Neither is better; they simply do different jobs.
How many photos can I put in a collage?
Technically as many as you like, but four to twelve keeps faces and details visible. Some tools handle 100-photo mosaics, though each image becomes tiny. If you want to include lots of photos while keeping them enjoyable to look at, a photo book gives every picture far more room than a single collage.