Key Takeaways
- Almost any flagship from the last three to four years takes photos sharp enough to print at 40×60cm and well beyond.
- Megapixels matter far less than you think. Sensor size, light and a steady hand decide your print quality.
- A clean 12-megapixel photo (about 3,000 × 4,000 pixels) prints sharply up to roughly 60×80cm.
- Shoot on the main camera, avoid digital zoom, and start from the original file — never a screenshot.
- In 2026 the best all-rounders for print are the iPhone 17 Pro, Samsung Galaxy S26 Ultra and Google Pixel 10 Pro.
How good does a phone photo need to be for printing?
Here is the honest answer most camera-review sites skip over: for printing, you need much less than the marketing would have you believe. A photo that looks crisp on your phone screen will usually look just as crisp once it is printed. The thing that lets people down is rarely the phone itself. It is poor light, a shaky hand, or zooming in too far.
When we talk about whether a photo is print-ready, three things matter, in this order: the quality of the light, sharpness (is it genuinely in focus and free of blur?), and resolution (how many pixels it contains). Get the first two right and the third rarely becomes a problem, because modern phones capture plenty of pixels by default.
Resolution, pixels and what "print-ready" really means
Resolution is simply the number of pixels in your image, usually written as width × height. To look sharp in print, you want those pixels packed reasonably tightly: around 150 to 300 pixels for every inch of the finished print. Smaller prints are held close to your face, so they need the higher end of that range. Larger prints are viewed from further away, so they get away with fewer pixels per inch.
That last point surprises people. A giant canvas does not need a wildly higher-resolution file than a medium one, because you naturally stand back to take it in. Your eye simply cannot resolve the difference from across the room.
Here is a practical guide for everyday phone photos:
| Print size | Pixels you want (roughly) | Will a modern phone manage it? |
|---|
| 10×15cm (standard photo) | 600 × 900 | Yes — even an older phone |
| 20×30cm | 1,200 × 1,800 | Yes — almost any phone from the last 8 years |
| 30×40cm | 1,800 × 2,400 | Yes — most recent smartphones |
| 40×60cm | 2,400 × 3,600 | Yes — flagships and most mid-range phones |
| 60×80cm | 3,600 × 4,800 | Usually — best from recent flagships in good light |
| 100×75cm and bigger | 4,000 × 6,000+ | Recent high-end phones, shot in good light |
A modern phone shooting at its standard 12 megapixels produces an image around 3,000 × 4,000 pixels. That is enough for a sharp print comfortably past 60×80cm. So if anyone insists you need a 50- or 200-megapixel phone to print big, take it with a healthy pinch of salt.
Quick answer: For printing, a 12-megapixel photo (about 3,000 × 4,000 pixels) is enough for a sharp print up to roughly 60×80cm. Aim for 150–300 pixels per inch at your chosen print size. Good light and a steady hand matter more than the megapixel count printed on the box.
DPI and PPI: the jargon, made simple
You will see two terms thrown around when people talk about print quality: PPI and DPI. They are often used as if they mean the same thing, and for everyday purposes you can treat them similarly, but here is the proper distinction.
- PPI (pixels per inch) describes your digital image — how many pixels sit in each inch when it is printed at a given size. This is the number that decides whether your photo looks sharp.
- DPI (dots per inch) describes the printer — how many tiny dots of ink it lays down per inch. Professional photo printers use very high DPI, which is why a good lab print looks smoother than a home inkjet.
The headline figure to remember is 300 PPI for top-quality prints viewed up close, dropping to around 150 PPI for larger pieces seen from a distance. You do not need to calculate any of this yourself — a reputable print service checks your file automatically and flags anything too low before you order.
The camera tech that actually matters for prints
If you want to understand why some phone photos print beautifully and others fall apart when enlarged, it helps to know what is going on inside the camera. Don't worry — no engineering degree required. A few simple ideas explain almost everything.
Why megapixels are the most overrated number
Phone makers love shouting about megapixels because the number is big, simple, and easy to print on a box. But more megapixels does not automatically mean better prints. What truly counts is the size of the camera sensor — the light-sensitive chip behind the lens — and the quality of the lens itself.
A larger sensor gathers more light. More light means cleaner images, richer colour, better detail in shadows and highlights, and far less of that grainy speckle (called noise) that creeps in when light is low. That is why a phone with a large 12-megapixel sensor often beats a phone with a tiny 50-megapixel one, especially indoors or after dark. Megapixels set the maximum size you can print; the sensor decides how good that print looks.
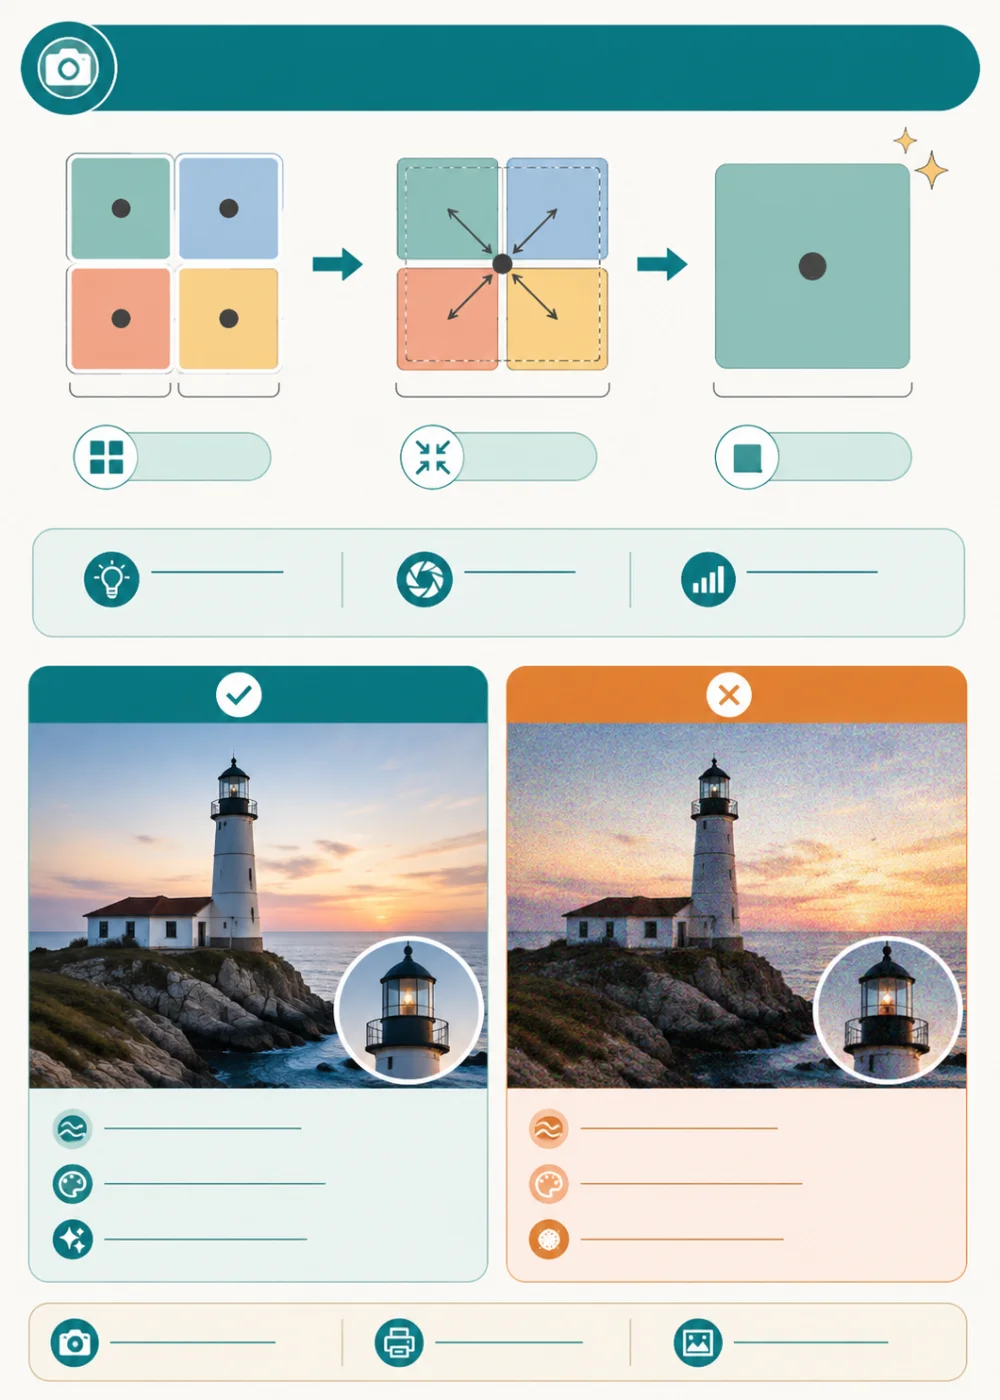
Pixel binning: why your 50MP phone saves 12MP photos
Here is a genuinely useful thing to understand. Most high-megapixel phones use a clever trick called pixel binning. They merge groups of tiny pixels into bigger, virtual ones, so a 48MP, 50MP or even 200MP camera usually saves a 12MP or 24MP photo by default.
Why throw away all those pixels? Because the combined pixels capture far more light. The result is a cleaner, brighter, more natural image — exactly what prints well. On the iPhone 17 Pro Max, for example, binning gives an effective pixel size of around 2.44 microns, roughly double the size of the raw hardware pixels. Bigger pixels, better light, better print.
In short, your phone is already doing the sensible thing for you. The default photo mode is tuned to produce the best everyday image, and that is usually the best one to print, too.
When the full-resolution mode is worth using
There is one exception worth knowing. If you are shooting in excellent light — bright daylight, a well-lit scene — and you plan to print very large (think A3, A2 or a sizeable canvas), switching to your phone's full-resolution mode (often labelled 48MP or 50MP) can capture extra fine detail that survives the enlargement.
The catch: those high-resolution files only look their best in good light. In dim conditions they tend to look noisier and flatter than the standard binned photo. So save the high-res mode for bright scenes destined for big prints, and trust the default for everything else.
Sensor size, aperture and stabilisation: a quick cheat sheet
If you are buying a new phone and want to compare cameras sensibly, look past the megapixel headline and check these specs instead. They tell you far more about real-world print quality.
| What to look for | Why it matters for prints | A good target |
|---|
| Main sensor size | Bigger sensors gather more light, giving cleaner, sharper files | 1/1.3-inch or larger |
| Pixel size (after binning) | Larger pixels mean less noise, especially in low light | 1.4 microns or more |
| Aperture (the f-number) | A wider aperture (lower number) lets in more light | f/1.8 or wider on the main camera |
| Optical stabilisation (OIS) | Reduces blur from hand shake — vital for sharp enlargements | OIS on the main camera |
| Optical zoom | A real zoom lens keeps detail; digital zoom destroys it | A dedicated telephoto lens |
Computational photography: the invisible helping hand
Modern phone photos are roughly half physics and half software wizardry. The moment you tap the shutter, your phone fires off several frames, merges them, reduces noise, balances the bright and dark areas, and even recognises faces, skies and greenery to treat each one appropriately. This is called computational photography, and it is why a mid-range Google Pixel can sometimes out-shoot far pricier hardware.
For you, the takeaway is simple and freeing: you do not need to fiddle with manual controls to get a print-worthy photo. Point, tap, and let the software do the heavy lifting. It is genuinely very good at it.

The best phone cameras for printing in 2026
Every flagship phone on sale today can produce gorgeous prints. The differences come down to consistency, how each phone handles tricky light, and how its colours look once they leave the screen. Based on the current crop of handsets, here are the phones we would happily print from at any size.
Best all-rounder: Apple iPhone 17 Pro and 17 Pro Max
Apple's latest Pro models carry a trio of 48-megapixel cameras — a main camera, an ultra-wide, and a telephoto for zoom. Their great strength for printing is colour. Skin tones look natural, greens and blues stay believable, and there is very little of the over-cooked, hyper-saturated look you sometimes get elsewhere. What you see on the screen is very close to what lands on your wall, which makes ordering prints refreshingly predictable.
They will also shoot a true 48MP file when you want maximum detail — overkill for most prints, but lovely to have for very large canvases shot in bright light. If you live in the Apple world and want a safe, brilliant all-round choice for printing, this is it.
Best for detail and zoom: Samsung Galaxy S26 Ultra
Samsung's top Ultra phone pairs a 200-megapixel main camera (with a notably bright f/1.4 lens) with an excellent ultra-wide and a proper 5x optical zoom. It is the most flexible camera system on a mainstream phone, so whether you are capturing a sweeping landscape or a distant subject, you will come away with a file packed with detail to print large.
Samsung's colours run a touch more vivid and punchy than Apple's. Many people love that for landscapes and bold wall pieces; others prefer to dial it back slightly before printing. Either way, the sheer detail on offer makes it a superb pick for big statement prints. A dramatic landscape shot on the S26 Ultra makes a striking poster print on proper photo paper — an affordable way to enjoy a large image you can swap out whenever the mood takes you.
Best for point-and-shoot reliability: Google Pixel 10 Pro and 10 Pro XL
If you simply want to lift your phone, tap once, and trust that the photo will be great, the Pixel is hard to beat. Google's processing produces consistently well-balanced images, with lovely detail held in both shadows and highlights. You rarely get a dud.
That reliability is exactly what you want for printing, because an uneven exposure shows up far more on a large print than on a phone screen. Both Pixel sizes share identical cameras, so you can choose the screen size you prefer without compromising on photo quality.
Best on a budget: Google Pixel 10a and the mid-range crowd
You do not need to spend four figures to print beautifully. Google's most affordable Pixel borrows much of the same smart processing as its pricier siblings, so it punches well above its price for still photos. For prints up to around 40×60cm, most people would struggle to tell its photos apart from a flagship's.
Other strong mid-range options worth a look include recent models from Samsung's Galaxy A and FE ranges, the latest Nothing phones, and OnePlus's value flagships. The rule holds across all of them: shoot in good light and they will print just fine.
What about older phones and other brands?
Plenty of excellent camera phones never make the headlines, including handsets from Xiaomi, Honor and Oppo, some of which carry genuinely large 1-inch sensors. And your current phone, even if it is a few years old, is very likely up to the job. An iPhone from around 2019 onwards, or a comparable Android, will happily print at standard photo sizes and a good way beyond.
Honest note: you probably don't need a new phone. If your handset is from the last three or four years, it will make lovely prints today — no upgrade required. Treat this list as guidance for your next phone whenever you do replace it, not a shopping list you need to act on now. The best camera for printing really is the one you already own.
Camera settings that make your prints look better
Your phone has a handful of settings that quietly decide how good your prints will be. Most are set sensibly out of the box, but a couple are worth checking. None of this is complicated, and you only need to do it once.
Shoot at the highest quality and resolution
Dig into your camera settings and make sure you are capturing photos at full resolution and highest quality, rather than a space-saving compressed version. On most phones this is the default, but it is worth confirming — especially if you have ever switched on a storage-saving mode to free up space. Those modes shrink your photos, and shrunken photos do not enlarge well.
Modern iPhones save photos as HEIC by default, while many Android phones use JPEG. Both print beautifully. HEIC files are smaller and hold a little more detail, but a few older devices and websites cannot open them.
You may also come across PNG, which is excellent for graphics and screenshots but not the natural choice for photographs — the files are large and the format is built for sharp-edged images rather than the soft gradients of a photo.
For trouble-free ordering, JPEG is the most universally accepted format for photos. If you ever struggle to upload a HEIC file, switch your iPhone camera to Most Compatible, or simply save a JPEG copy before uploading. Most good print services, ours included, accept both HEIC and JPEG, so you usually will not need to think about it at all.
Should you bother with RAW?
Some phones let you shoot in RAW, an unprocessed format that keeps every scrap of data for editing later. It is brilliant if you enjoy fine-tuning photos on a computer, because it gives you maximum control over colour, brightness and detail. But it is not essential. A good JPEG or HEIC straight from the camera prints superbly, and RAW files actually need editing before they look their best. If the word RAW means nothing to you, you can happily ignore it and lose nothing.
Get the framing and orientation right
A little thought at the moment of shooting saves a lot of compromise later. Prints come in fixed shapes (aspect ratios), and a photo composed with that in mind crops far more gracefully.
- Turn on the gridlines. Your camera's grid helps you straighten horizons and frame shots well. A crooked horizon is glaringly obvious on a large print but easy to miss on a small screen.
- Mind the orientation. Landscape (wider than tall) suits scenery and group shots; portrait (taller than wide) suits people and tall subjects. Shoot in the orientation you intend to print.
- Leave a little breathing room. Don't crop too tightly in-camera. A bit of space around your subject gives you flexibility to fit different print shapes without lopping off someone's head.
This kind of careful framing pays off especially when you are gathering many photos together. A run of well-composed shots from a holiday or a whole year of family life makes a wonderful personalised photo book, where consistent framing helps every page feel considered rather than thrown together. Our personalised photo album guide has plenty of practical tips on choosing and arranging images if you fancy going down that route.
Settings checklist before a big print:
- Highest resolution and quality switched on
- Shot on the main camera, not digital zoom
- In focus, with a level horizon
- Taken in good light, with a steady hand
- Saved as a full-size JPEG or HEIC (never a screenshot)
How to take print-worthy photos on any phone
Whichever phone you own, a few simple habits will lift your photos from good to genuinely frame-worthy. None of this needs a photography course — just a little awareness next time you raise your phone.
Light is everything
If you remember one thing from this entire guide, make it this: good light beats good gear every single time. Soft, natural light from a window, or the gentle glow in the hour after sunrise and before sunset (photographers call it the golden hour), flatters almost any subject. Harsh midday sun carves out hard shadows, while dim indoor light forces your phone to work overtime and invites grain.
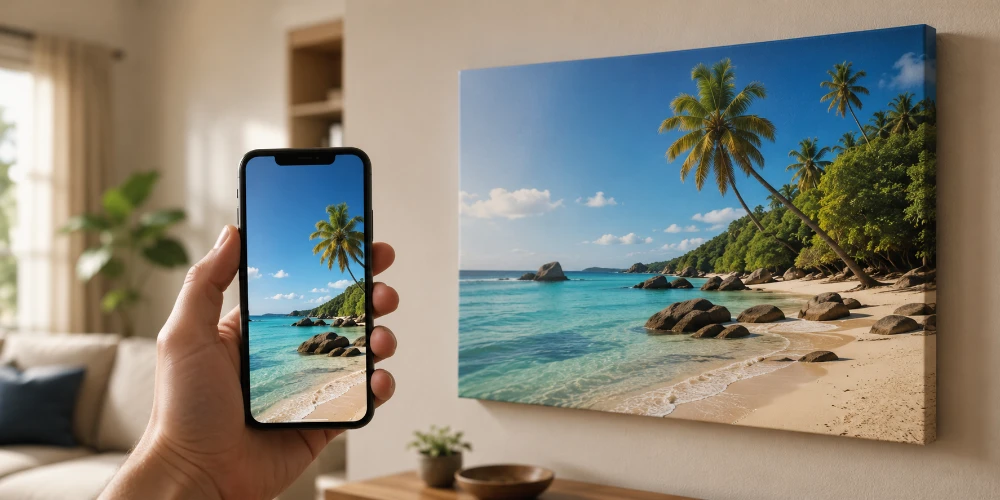
A photo taken in lovely light has a quality that holds up at any size. It is the difference between a snapshot and something you will want to live with. A landscape or portrait caught in beautiful light deserves room to breathe, which is why it makes such a natural canvas print: the gallery-wrapped finish wraps the image around a wooden frame so it looks complete from every angle, with no glass to bounce back glare. If you would like to see exactly how uploading and sizing works, our step-by-step guide on how to print on canvas covers it clearly.
Compose with intention
- Use the rule of thirds. Imagine your frame divided into nine equal boxes. Placing your subject along those lines, rather than dead centre, usually creates a more natural, pleasing photo.
- Watch the background. A cluttered background pulls attention away from your subject. A quick step to the left or right often tidies the whole scene.
- Find a foreground. In landscapes, including something in the foreground — a rock, a flower, a path — adds depth and draws the eye into the picture.
- Look for lines. Roads, fences, rivers and railings that lead toward your subject give a photo a satisfying sense of direction.
Keep it sharp
Sharpness is where many would-be prints fall down. The usual culprits are camera shake and digital zoom, both easy to avoid once you know.
- Hold steady or brace yourself. Lean on a wall, prop your elbows against your body, or rest the phone on something solid. Even a moment of stillness as you tap the shutter makes a visible difference.
- Tap to focus. Tap your main subject on the screen before shooting, so the phone focuses exactly where you want it rather than guessing.
- Avoid digital zoom. Pinching to zoom simply crops into the image and throws away detail, leaving prints soft and mushy. Move closer with your feet if you can, or use a dedicated zoom lens if your phone has one.
- Clean your lens. It sounds almost too obvious, but a smeary, pocket-fluff-covered lens is the single most common cause of hazy phone photos. A quick wipe with a soft cloth works wonders.
Make the most of portrait and night modes
Portrait mode blurs the background to make your subject pop, mimicking the look of a professional camera. It is wonderful for people and pets, though it occasionally fumbles fine details like flyaway hair, so check the edges before you commit a portrait shot to a large print.
Night mode works small miracles in low light, holding the shutter open for a moment to gather more light. Keep the phone very still while it does its thing — propping it on a surface helps — and you will get usable shots in conditions that would once have been hopeless.
Edit with a light touch
A gentle edit can make a photo sing. Free apps like Snapseed and Lightroom (both available on iPhone and Android) let you nudge brightness, contrast and colour with ease. The golden rule is restraint.
Heavy filters, extreme saturation and aggressive sharpening can look striking on a phone but harsh and unnatural once printed large. A few small adjustments go a long way: lift the brightness a touch (prints tend to look slightly darker than glowing screens), add a little contrast, and gently warm or cool the colour if it looks off. Then stop. Restraint is what separates a natural-looking print from an over-processed one.
For bold, colourful shots that you have edited to really pop, an acrylic print is a beautiful match: setting your photo behind a slim pane of crystal-clear acrylic glass deepens the colours and adds a glossy sense of depth that suits vivid images perfectly.

Choosing the right print for your photo
Once you have a photo you love, the enjoyable part begins: deciding how to bring it into the real world. Different photos suit different formats, so here is how to match a great phone shot to the print that will show it off best.
Statement pieces for the wall
A standout landscape, a wedding shot or a favourite family portrait deserves to be seen large. Canvas remains the classic choice for warmth and a finished, framed look without any glass. For a bolder, more contemporary statement, a metal print on aluminium brings serious presence: your photo is reproduced on a slim aluminium composite panel with crisp definition and rich colour, and because it stands up well to humidity, it even suits a kitchen or bathroom. If the idea intrigues you, here is a quick read on what a metal print actually is and how it is made.
Relaxed, flexible and fun
Not every photo needs to be a grand centrepiece, and some of the best displays are the most casual. MIXPIX® photo tiles let you build and rearrange a whole wall of square prints using a nail-free Magnofix® hanger — magnetic and adhesive, so they grip almost any surface and lift off again without damage. They are tailor-made for renters and for the everyday phone snaps that make you smile: the spontaneous, the silly, the spur-of-the-moment shots that rarely make it to a formal frame but absolutely deserve a place on your wall.
Keepsakes you can hold
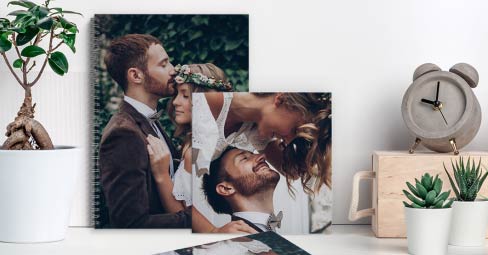
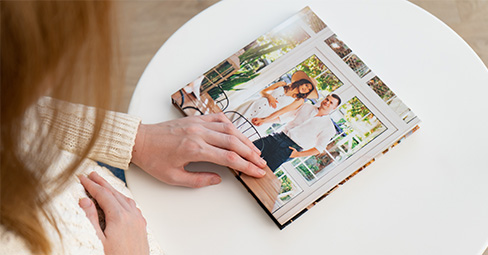
Some collections are better thumbed through than hung up. A holiday, a new arrival, or a whole year of family life works beautifully gathered into a printed book — a tactile keepsake you will actually return to, rather than dozens of photos scattered across a camera roll and forgotten. There is real evidence that revisiting physical photographs strengthens our emotional connection to those memories in a way that endless scrolling never quite manages.
Match your photo to the right print:
- Landscapes and portraits you want to show off → canvas
- Bold, colourful, edited shots → acrylic or metal
- Casual everyday snaps → photo tiles
- Large images you like to refresh → poster prints
- A whole event or year of memories → a photo book
Where and how to get your phone photos printed
Once your photo is ready, you have two broad routes: print it at home, or use a printing service. For anything you care about, a service almost always wins on quality and value.
Home printing vs a printing service
Home photo printers can be fun for quick snaps, but they struggle to match a professional lab. Good ink and proper photo paper are expensive, colours can drift, and a home printer simply cannot match the colour depth and longevity of professional kit. For standard prints, wall art, photo books and gifts, an online or high-street service gives you better results for less outlay.
You will find plenty of options in the UK, from high-street names with in-store kiosks to online services that deliver to your door. When comparing them, look beyond the headline price: check the paper quality, the colour accuracy, the available sizes, and how long the prints are guaranteed to last. A cheap print that fades within a couple of years is no bargain.
How to print straight from your phone
Printing from your phone is genuinely simple. The usual steps are:
- Choose your sharpest, best-lit original photo from your camera roll — not a screenshot or a shot saved from a messaging app, both of which strip out detail.
- Open the print service's website in your phone's browser, or its app, and pick the product and size you want.
- Upload your photo directly from your phone. A good service checks the resolution and warns you if the file is too small for your chosen size.
- Position and crop the image in the preview, double-check the orientation, and confirm.
- Place your order and wait for it to arrive. That's it.
You rarely need a dedicated app. Most services, ours included, let you upload from your phone's browser with no login required, so you can go from camera roll to completed order in a few minutes.
How long will your prints last?
Print longevity varies enormously between services and products, and it is worth asking about. Cheap prints on poor paper can start to fade within a few years, particularly in bright rooms. Quality wall art is a different story: our canvas prints, for instance, are produced with HP latex inks and carry a 75-year fade guarantee, so a photo you print today should still look vibrant decades from now. When you are turning a precious memory into something for the wall, that permanence is the whole point.
Common phone-printing problems (and how to fix them)
"My photo looks blurry when printed" — Nine times out of ten this is camera shake or digital zoom, not a low-quality phone. Reshoot in better light, hold the phone steady, and stick to the main camera. If the original is soft, no print can rescue it, so always start from the sharpest version you have.
"The colours look different on the print" — Phone screens are backlit and very bright, so they make photos look more vivid than they really are. Prints reflect room light instead, so they can appear a touch softer or darker. A small brightness boost before ordering usually closes the gap. Avoid editing in a very dark room, which fools you into making photos too dark.
"The website says my photo is too low resolution" — This almost always means the file is a screenshot, a heavily zoomed crop, or an image saved from a messaging app, all of which discard detail. Go back to the original photo in your camera roll and upload that instead. If you are printing very large, either choose a smaller format or pick a sharper, higher-resolution shot.
"My old photos look grainy" — Photos from older phones, or pictures compressed years ago through social media, simply hold less detail. They will still print nicely at smaller sizes. Keep older or lower-quality images to modest formats, and save the large prints for your crisp, recent shots.
"My panoramic or unusual-shaped photo won't fit" — Very wide panoramas and unusual crops don't always match standard print shapes. Look for a print format designed for wide images, or accept that a little of the image may be trimmed to fit. Previewing the crop before you order lets you control exactly what stays in frame.
The bottom line
The best camera for printing your photos really is the one already in your pocket. Phone cameras in 2026 are extraordinary, and the gap between a top flagship and a sensible mid-range phone matters far less than how you use it. Shoot in good light, hold steady, keep to the main camera, and start from the original file — do those four things and you will have photos genuinely worth putting on the wall.
So have a scroll back through your camera roll. That sunset, that birthday, that quiet ordinary moment you almost forgot — any of them could be the next thing you frame, hang or hand to someone you love. The hardest part, honestly, is choosing which one to print first.