Why your hallway deserves better than blank walls
Walk into most British homes and the hallway is a sort of holding zone. Coats, shoes, post on the floor, a single picture from John Lewis hung slightly too high. It is the room everyone passes through but no one decorates.
That is the opportunity. Putting photos on the walls of a hallway transforms it from a corridor into a proper part of the home. Guests notice it the moment they walk in. So do you, every time you come home from work.
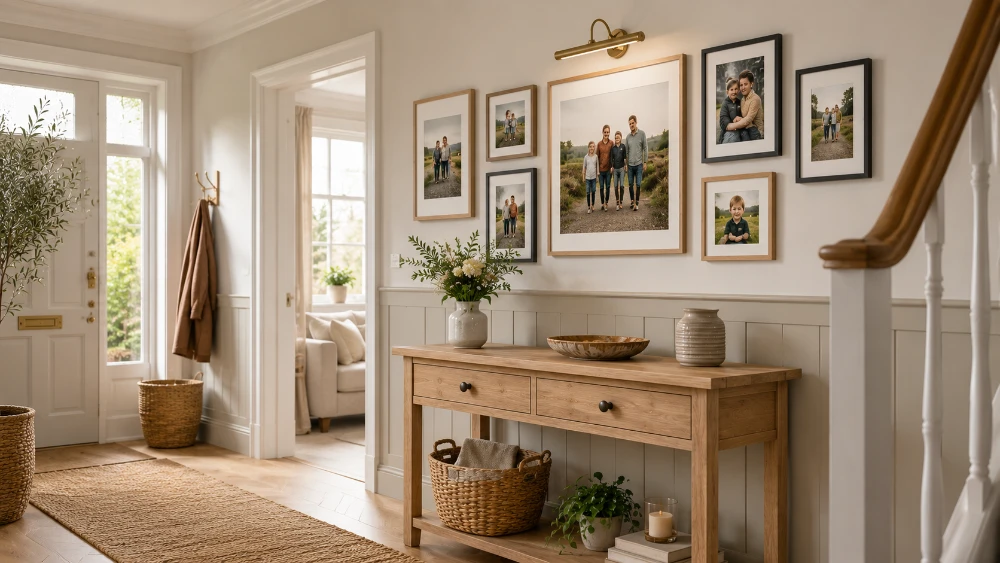
There is a practical case for photos in particular. A hallway is usually a high-traffic, low-light space, often a bit narrow. Photographs cope brilliantly with all of these conditions:
- They give people something to look at as they walk through the space — which makes a narrow corridor feel intentional rather than cramped
- They handle the lower light better than colour-heavy art prints, especially in black and white
- They are deeply personal — guests immediately learn something about you, which warms the whole house up
- They can be hung in long horizontal rows or vertical stacks, both of which suit hallway proportions

15 photo display ideas for your hallway
 PSaveGet Up to EXTRA 20% Off
We have organised these by where they go — entrance, staircase, landing, narrow corridor, and a few special-case ideas at the end. Pick whichever fits your house. There is no right answer, just one that works for your space.
Entrance hall ideas (the wall you see when the door opens)
1. The classic above-console trio
Three matching photos in a row above a console table. This is probably the most reliable hallway display in any British home. It looks tidy, intentional and polished — and it works in almost any style of house, from a Victorian terrace to a minimalist new build.
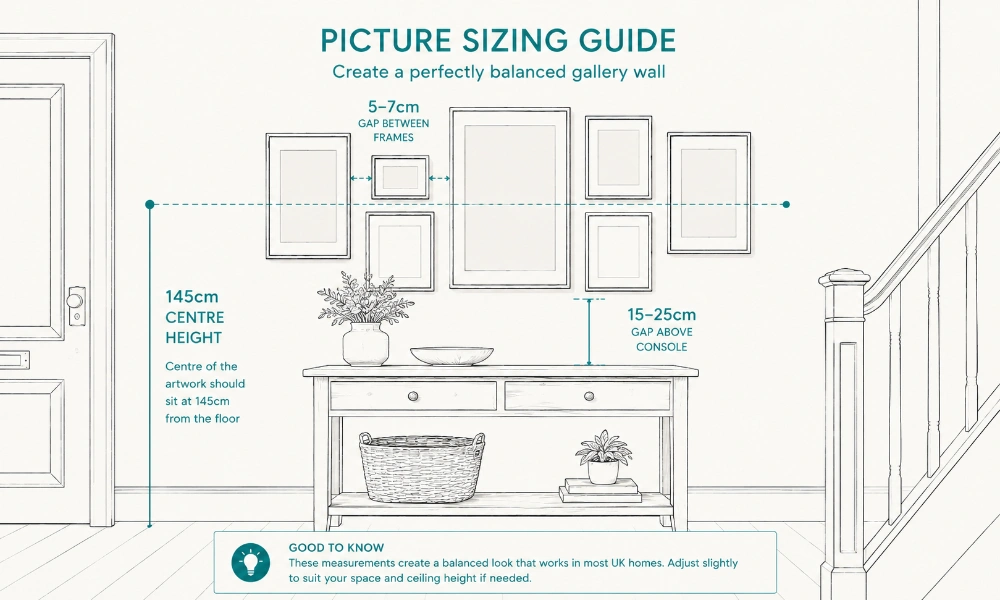
The key is to keep all three photos at the same size and the same orientation (all landscape or all portrait), with consistent spacing of around 5–7cm between them. Pick three shots that share a colour palette or treatment — three black-and-white portraits, three coastal landscapes, three travel photos from the same trip.
Best size: 3x 30×40cm or 3x 40×60cm depending on console width
Hanging height: Bottom of frames 15–20cm above the back of the console
2. The single statement photo above the console
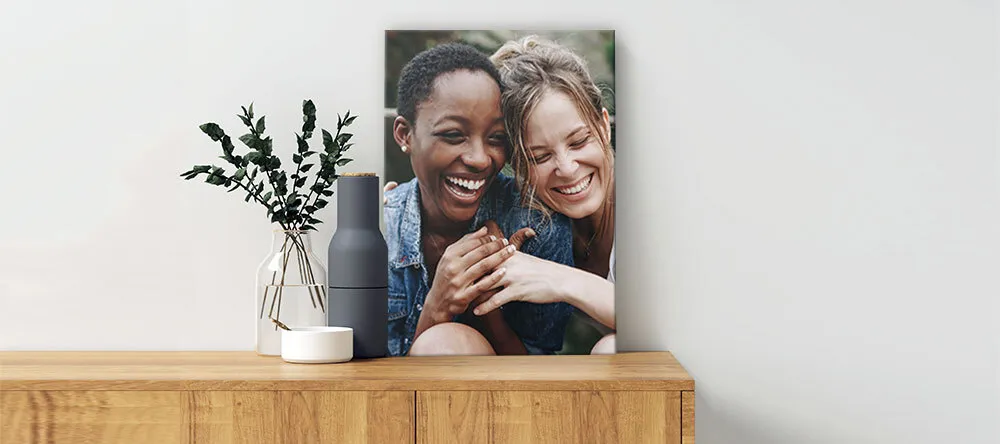
If the wall above your console is on the smaller side, or you just want something cleaner, a single bigger photo works beautifully. One large landscape image, one striking portrait, one wedding shot — whatever has the most meaning. The simplicity is the point.
This is the sort of placement where a canvas print really earns its keep — gallery-wrapped canvas finishes don't need an outer frame, so they sit cleanly on the wall and don't reflect glare from the front door's natural light. Sizes from 60×40cm up to 80×60cm look right above a standard console.
3. The asymmetric family cluster
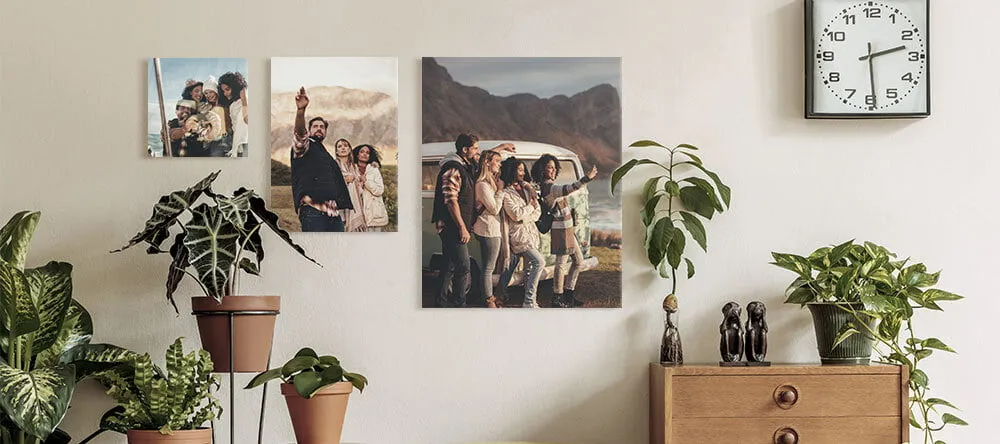
Five to seven photos arranged in a loose, asymmetric cluster. One bigger anchor photo in the centre, smaller frames building outwards. This gives the entrance hall a more relaxed, lived-in feel — like a wall that has grown over time rather than being installed all at once.
It is more forgiving than a strict grid, which means you can keep adding to it as new family photos come in. Mix orientations, mix subjects, but keep the frames consistent — all white, all black, or all natural wood — to stop it looking chaotic.
4. The mirror-and-photo combination
A round mirror flanked by two smaller photos, or a long horizontal mirror with a photo trio above it. Mixing a mirror into your photo display does two useful jobs: it bounces extra light around a usually-dark hallway, and it gives guests a place to do a final once-over before they leave.
Hang the mirror as the centrepiece and treat the photos as supporting cast. Two 30×40cm prints sitting either side of a 60cm round mirror is a layout that works in almost every UK entrance hall.
Staircase gallery wall ideas (the wall up the stairs)
5. The classic ascending staircase gallery
Photos hung in a staggered line that follows the angle of the staircase. This is one of the most iconic photo displays in any British home, and for good reason — it makes brilliant use of a wall that otherwise tends to sit empty.
The trick is to imagine an invisible diagonal line running parallel to the stairs, and hang each photo so its centre sits on that line. Most people make the mistake of hanging photos at random heights up the staircase wall. The diagonal-line method is what turns it from messy into properly designed.
For the staircase, framed photo prints with bevel-cut mounts work particularly well — the formal frame and white mount give the gallery a slightly more finished, traditional look that suits the architectural feature of a staircase. A mix of 30×40cm and 40×50cm frames, all in the same colour, lets you build out the wall while keeping things cohesive.
Spacing tip: 5–7cm between frames, measured at the closest points (not from frame centre to frame centre)
6. The big stairwell statement wall
If your staircase has a tall double-height wall — common in newer detached houses, converted lofts and Victorian semis with high ceilings — go big. A single very large photograph, or three large prints arranged vertically, can fill a stairwell wall in a way that smaller pieces never will.
This is a wall that gets viewed from below, from above, and from the landing — so think about how the image works from multiple angles. Wide landscape photographs and architectural shots tend to work best. Sentimental family portraits look brilliant here too, but at scale: think 80×120cm rather than 30×40cm.
For a stairwell that genuinely catches the light, acrylic glass prints are worth a look — the depth and gloss of the acrylic surface gives photographs a striking, almost back-lit quality that suits big modern stairwells. They hold up well on walls that get strong daylight from upstairs windows, where matt finishes can sometimes look flat.
7. The diagonal triptych up the stairs
Three matching photos in a perfect diagonal line that follows the staircase rise. Cleaner and simpler than a full ascending gallery, but with most of the visual impact. Particularly good if you do not have many wall photos and would rather not commit to a 12-frame project.
Keep them all the same size — three 40×50cm prints work for a typical UK staircase. The geometry of the diagonal does the heavy lifting.
8. The picture rail across the top of the stairs
If your home has a Victorian or Edwardian picture rail running along the top of the staircase wall, use it. Hanging photos from picture rail hooks on adjustable steel wire means zero drilling, and you can change the heights of individual photos at any time. For renters, this is a gift.
For homes without picture rails, you can fit a simple shelf-style picture ledge along the top of the staircase wall and lean photos along it — same idea, much less commitment.
Landing and upstairs photo wall ideas
9. The upstairs landing gallery wall
The landing at the top of the stairs is one of the most underused walls in any British house. People walk past it twenty times a day and never look. A proper photo wall on the landing changes that immediately.
Unlike the staircase wall, the landing is usually a flat wall at a consistent height, which means a strict grid arrangement works beautifully. Try a 3×3 grid of nine matching square prints, or a 2×4 grid of eight portrait-orientation photos. The clean geometry feels modern and intentional.
Try this: 9x 30×30cm square prints in a perfect grid, with consistent 5cm spacing in all directions. The repetition of identical squares creates a quietly powerful visual rhythm.
10. The long landing horizontal row
In bigger houses, the upstairs landing can run quite long — sometimes 4 or 5 metres of unbroken wall. A single horizontal row of 5–7 photos, all hung at the same centre height, fills this space without overwhelming it.
Use a spirit level for this one. Even small misalignments are obvious in a long row, and there is nowhere for them to hide.
Narrow hallway and corridor ideas
11. The single horizontal row at eye level
Narrow hallways are one of the most common tricky spaces in UK homes — particularly in Victorian and Edwardian terraces, but also in modern flats. The instinct is to leave the walls bare to avoid making the corridor feel even narrower. That instinct is wrong.
A single horizontal row of photos along one wall actually opens a narrow hallway up. The eye follows the row from one end to the other, which extends the apparent length of the corridor. The key is restraint: one wall only, one consistent row, all frames the same size and colour.
Best sizes: 5 to 7 frames at 20×30cm or 30×40cm, hung in a single line with the centre of each frame at exactly 145cm from the floor
12. The vertical totem of three
In hallways where there is barely any wall length to work with — small flats, square Victorian return spaces, awkward landings — three photos stacked vertically make brilliant use of the height instead of the width. This is sometimes called a totem display.
Keep the frames identical, hang them tight (3–4cm apart), and centre the stack on whatever bit of wall you have. Three 30×40cm portrait-orientation prints stacked vertically take up less than 130cm of wall height — well within reach of even the shortest hallway.
13. The MIXPIX® cluster (no drilling)
Renting? Hate making holes in plaster? MIXPIX® photo tiles are a brilliant solution for narrow hallways and rented flats. They use a magnetic and adhesive Magnofix® hanging system — the adhesive disc sticks to the wall, and the lightfoam tile attaches magnetically. You can rearrange them as often as you like with no wall damage at all.
A cluster of nine or twelve square photo tiles makes a striking, modern hallway feature, and the lightfoam construction means each tile weighs almost nothing. Great for awkward spaces where a heavy frame would be a worry.
14. The family timeline display
This is one of the most emotionally satisfying things you can put in a hallway. Photographs of your family arranged chronologically — earliest on the left, most recent on the right — telling the story of your family through the years.
The best family timelines mix scanned photos from older generations (grandparents, great-grandparents) with more recent shots of the current family. A wedding from 1958, a christening from 1985, a current family portrait. Guests stop and look at these displays in a way they never do for purchased art.
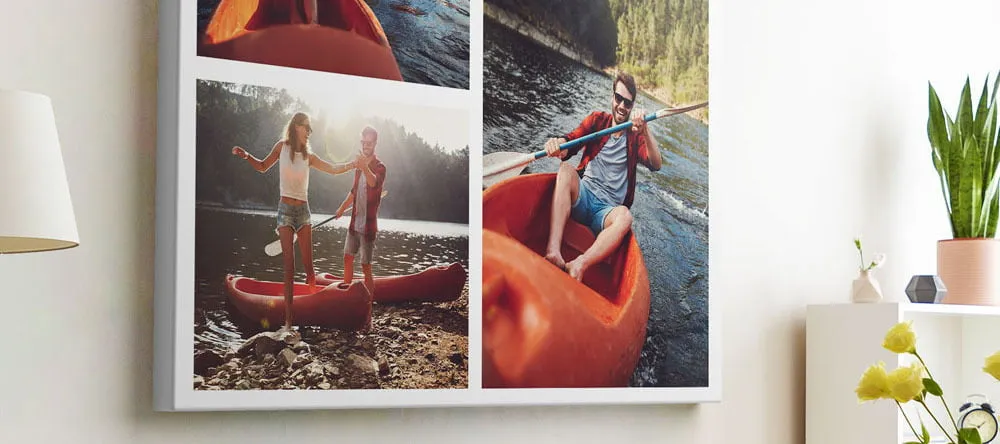
If you have a single favourite family group photo, photo collage on canvas lets you put a whole multi-photo timeline onto one piece — useful when you have lots of photos and limited wall space. Combine 6–12 of your favourite family shots into a single canvas and you have your whole timeline in one frame, ready to hang.
15. The travel collection
If you travel a lot — or used to, before life happened — your hallway is a brilliant place to celebrate it. A curated wall of travel photographs from different destinations gives guests something genuinely interesting to look at, and reminds you of trips every time you come home.
The trick to making a travel display look intentional rather than scattershot is to apply some kind of unifying treatment. All in black and white. All with the same warm-toned filter. All printed at the same size with matching frames. The consistency holds the collection together even though the destinations are completely different.
Hallway photo ideas for British home types
 PSaveGet Up to EXTRA 20% Off
UK houses come in particular flavours that affect how you should hang photos. Here is what works in each.
Victorian and Edwardian terraced houses
If you live in a terrace built between roughly 1840 and 1910, your hallway probably has some combination of: a long narrow corridor, a tiled or wooden floor, a picture rail running about 30cm below the ceiling, and a tall ceiling height (often 2.5–2.7m).
Use the picture rail. It is genuinely the easiest way to put pictures in the hallway, especially if you are renting or do not want to drill. A set of brass picture rail hooks and adjustable steel wire will hold framed prints of up to 15kg with absolutely no wall damage.
Take advantage of the ceiling height by hanging photos higher than you would in a modern home. A tall vertical totem or a long horizontal row positioned slightly above eye level draws the gaze upward and emphasises the period proportions.
New-build homes
Modern new-builds have lower ceilings (usually 2.4m) and dot-and-dab plasterboard walls — a layer of plasterboard stuck to the brick with adhesive blobs, with a void behind. Standard wall plugs do not work well in this construction.
- Use cavity wall fixings designed for plasterboard — Toggler-style or expanding fixings — for any frame heavier than about 3kg
- Avoid very tall vertical photo arrangements — they can make a 2.4m ceiling feel even lower
- Horizontal rows and grids both work brilliantly in new builds — they emphasise width rather than height
Rental flats and houses
When you cannot drill, you have to get clever. The good news is there are now genuinely workable no-drill options that hold photos securely without leaving any trace when you move out.
- Command Strips (3M brand) hold prints up to about 3–4kg. Clean the wall with an alcohol wipe first, press for 30 seconds, and wait an hour before hanging
- Picture rails (if your flat has them) take any weight and leave zero damage
- MIXPIX® photo tiles use the Magnofix® adhesive-and-magnetic system and remove cleanly when you leave
- Lean larger pieces against the wall on a console table or shoe bench rather than hanging them
North-facing and dark hallways
Most UK hallways are dark. They tend to have no windows of their own, and they are usually positioned in the middle of the house. Lighting your photos properly makes a real difference.
- Choose photos with brighter overall tones — warm sunny landscapes, lighter portraits, beach scenes — rather than dark moody images that disappear in dim light
- Add a picture light or angled wall spotlight directed at your main photo or gallery wall
- White or pale frames bounce more light around a dark hallway than dark frames
- If choosing colour photos, slightly warmer tones (golden, amber, terracotta) suit dark hallways better than cool blues and greys
Sizing and spacing for hallway pictures
 PSaveGet Up to EXTRA 20% Off
Hallways have their own sizing rules because they are usually narrower and longer than living rooms. Here is what actually works.
How big should hallway pictures be?
There is a useful rule for hallway photo sizing: the width of your full picture arrangement should be roughly two-thirds the width of whatever furniture sits below it (a console, a shoe bench, a radiator). For a 100cm console, you are aiming for an arrangement around 65–70cm wide.
If there is no furniture below — just a blank wall — you have more freedom. Single statement photos work well at 60×40cm or 80×60cm. Gallery wall arrangements work well filling roughly 60% of the available wall width.
If you are unsure what size works, our wall art size guide walks through the sizing maths for every room in detail — including the specific tricky ratios for narrow hallways and stairwells.
How high should hallway photos be?
The standard gallery rule is to hang the centre of the picture at 145cm from the floor. This works for most hallways — it is the natural eye-level for an average adult and it sits comfortably above most console tables and radiators.
Two situations where this rule changes:
- Above a console, sideboard or radiator: the bottom of the picture should sit 15–25cm above the top of the furniture, even if that means the centre is slightly above 145cm
- In a narrow corridor: hang slightly higher (centre at 155–160cm) so people walking through don't feel crowded by the photos
How far apart should pictures be spaced?
Standard gallery spacing is 5–7cm between frames. For a hallway, where people are walking past at close range rather than viewing from across a room, this works perfectly. Keep all the spacing identical — that is what makes a gallery wall look professional rather than thrown together.
One exception: for a triptych split (one image cut across three frames), use much tighter spacing of 2–3cm so the image reads as continuous.
Picking the right photos for your hallway
 PSaveGet Up to EXTRA 20% Off
The best hallway photos are not necessarily your best photos — they are the ones that work in a corridor environment, viewed at speed, often at a glance. Here is what we have learned from putting up a lot of hallway galleries.
What works brilliantly
- Portrait shots with faces — guests instinctively look at faces, which makes the photo feel meaningful even with a quick glance
- Strong simple compositions — busy, detailed images get lost in passing glances
- Black-and-white treatment — instantly cohesive, hides colour-clash issues with hallway paint
- Photos with strong emotional content — wedding moments, candid family laughs, pet portraits
- Wider landscape shots in long horizontal hallways — they emphasise the linearity
What to avoid
- Very dark photos in already-dark hallways — they will disappear
- Heavily zoomed phone shots — enlargement degrades quality
- Photos with lots of small detail — invisible from arm's length
- Mixed colour temperatures across a gallery — warm-toned photos next to cool-toned ones can look jarring
Should hallway photos be in colour or black and white?
Both work. Black and white tends to be the safer choice for hallways because:
- It removes any colour clash with your wall paint
- It makes a mixed collection of photos feel cohesive
- It gives even smartphone photos a more elevated, gallery-like feel
- It works particularly well in dim hallway lighting
That said, a colour photo gallery in a well-lit hallway can be brilliant, especially for travel or landscape collections where the colour is the point.
Hanging tips for high-traffic hallways
Hallways take more abuse than any other room in the house. Suitcases bash past them. Kids run through them. Coats brush against the walls. A few extra precautions when hanging make sure your photos survive the chaos.
Use proper fixings
A standard brass picture hook is fine for frames up to 5kg. For anything heavier — typically anything over 60×80cm or with glass — use a proper screw and wall plug, or two hooks placed evenly across the back of the frame. Two hooks also stop the frame tilting when someone bumps it.
Add anti-tilt putty
A small ball of poster putty or museum gel pressed onto the bottom corners of each frame keeps it dead level even when knocked. Particularly useful for frames hung on staircase walls, where the bumping happens daily.
Plan around radiators
Most UK hallways have a radiator somewhere along their length. Avoid hanging photos directly above one — the rising heat and dry air can warp wooden frames and damage prints over time. Leave at least 30cm between the top of the radiator and the bottom of any frame.
The paper template trick
Before drilling a single hole, cut pieces of newspaper or kraft paper to the exact size of each frame and stick them to the wall with masking tape. You can rearrange the layout as many times as you want, walk past it for a day or two, and only commit to drilling once you are sure.
This sounds obvious. It is also the single best way to avoid the most common mistake in hallway photo hanging — which is putting the photos in slightly the wrong places and never quite being able to fix them.
Going further
 PSaveGet Up to EXTRA 20% Off
If you are getting properly into photo wall arrangements, our complete guide to gallery wall ideas covers more than 100 layouts across every room in the home — including some specifically for stairwells and entrance halls.
Final thoughts
A hallway with properly hung photos is one of the easiest ways to make a house feel like a home. It costs less than most decor projects, takes a weekend, and gives you something to look at every time you walk through the door — instead of plain plaster.
Pick whichever of the 15 ideas suits your hallway best. Use the paper template trick before drilling. Hang things at 145cm centre height. And do not be afraid to leave breathing space — the gaps between photos are as important as the photos themselves.
If you are after canvas prints, framed photo prints or photo tiles for your hallway gallery, our Factory Prices start from £4.50, and our prints are made with HP latex inks that come with a 75-year fade guarantee — so they will outlast pretty much everything else in the corridor.
Why choose MY-PICTURE.CO.UK over other competitors?
Pictures in the hallway set the tone the moment guests step inside, and My-Picture.co.uk gives you the prints and canvases to make that first impression count. Style a whole run of frames without stretching the budget, because our Lowest Price Guarantee beats any matching UK product by 5% if you find it cheaper somewhere else.
Hallway displays catch the light all day, so colour that stays true matters, and our HP Latex printing delivers exactly that on durable, fade-resistant materials. Fast dispatch, helpful customer service and the highest Trustpilot rating among the UK's major photo-printing brands mean your welcoming gallery arrives looking its best.
*Ratings and prices correct as of August 2026. Prices exclude delivery; all brands run periodic promotions.
Frequently Asked Questions About Hallway Photo Displays
How many pictures should I hang in my hallway?
For a typical UK hallway, 5–9 photos in a single grouped arrangement is the sweet spot. Fewer than 5 can look sparse. More than 9 starts to feel cluttered unless you are deliberately going for a salon-style maximalist look. For a staircase wall, 7–12 photos is the typical range. For a long landing, 5–7 in a horizontal row works beautifully.
How high should I hang pictures in my hallway?
Hang the centre of your picture at 145cm from the floor — this is gallery standard and the most comfortable viewing height for most adults. For pictures above a console or radiator, prioritise leaving 15–25cm of breathing space above the furniture, even if that pushes the centre slightly higher than 145cm.
What size pictures work best in a narrow hallway?
In narrow corridors (under 1.2m wide), stick to medium and small frames — 20×30cm and 30×40cm are the sweet spot. Anything bigger than 40×60cm starts to dominate the space. Hang them in a single row along one wall only, with consistent spacing of 5–7cm, and centre everything on the same horizontal line.
Can I put pictures on the staircase wall safely?
Yes, as long as the fixings are appropriate for the wall type. Staircase walls are usually plasterboard over brick (in older homes) or dot-and-dab plasterboard (in new builds). Use a proper screw and wall plug — and for anything over about 1kg, use two fixings rather than one to stop the frame tilting when knocked. A small ball of museum putty on the bottom corners helps keep frames level on heavily used staircases.
Should hallway pictures be in colour or black and white?
Black and white is generally the safer choice for hallways — it suits dim lighting, removes any colour clash with the walls, and makes mixed-source photos feel cohesive. But a well-lit hallway with colour-heavy photos (travel, landscapes, family portraits) can be just as effective. The most important thing is consistency: pick one approach and stick to it across the whole gallery.
How do I hang pictures in the hallway without making holes?
Three practical no-drill options: Command Strips for frames up to 3–4kg (clean the wall first, press for 30 seconds, wait an hour before hanging); picture rails if your home has them — period homes often do; or photo tiles like MIXPIX® which use a Magnofix® adhesive system and remove cleanly without damaging plaster. For renters, all three options leave no trace when you move out.
What is the best wall art for a long narrow hallway?
A single horizontal row of 5–7 medium-sized photos along one wall, all hung at exactly the same centre height, is the most reliably good option. The row draws the eye from one end of the corridor to the other, which makes the hallway feel longer and more intentional rather than cramped. Avoid filling both walls — that genuinely does narrow the visual space.
Can I mix canvas prints, framed prints and other formats in one hallway gallery?
Yes, but maintain at least one consistent element across all formats. The most common unifying threads are colour treatment (all in black and white), photo subject (all family, all travel) or scale (all roughly the same proportional size). Without at least one of those, mixing formats can look messy rather than curated.
How do I light pictures in a dark hallway?
A picture light or angled wall spotlight directly on your main photo or gallery wall makes a huge difference — both for visibility and for atmosphere. Battery-operated picture lights are now widely available if you don't want to wire in a permanent fitting. White or cream painted walls also bounce more available light onto your photos than dark or saturated wall colours.
How often should I update or refresh my hallway photos?
Most hallway galleries benefit from a small refresh every 1–2 years — adding a recent family portrait, swapping out a photo that no longer feels relevant, or replacing an older print with a higher-resolution version. A complete re-do every 5 years or so keeps the gallery feeling current rather than frozen in time.